Exporting animated characters from Maya to Facebook’s AR Studio
In the process of planning for an upcoming project, I’ve encountered 2 rather significant limitations with Facebook AR Studio due to its restrictions on the number of bones that a mesh can be bound to and the fact that joint animations are not imported with the 3d asset. I’d like to share my solutions to both of these issues.
Exporting joint animations:
UPDATE 5/18/2018: AR studio now natively supports exported animations with release v37.
TLDR; I wrote a Maya joint animation export script along with a corresponding tutorial video.
So I will cover what is likely the most common issue first – exporting joint animations with a rigged character. As of v32 AR Studio does not import joint animations on rigged meshes. This is a pretty big limitation. This means that if you build, rig, and animate your character in a 3d authoring tool (in my case Maya) you will not be able to import those animations into AR Studio along with your model. It’s just not going to work.
The only real option for developers currently is to programmatically animate the translation and rotation of each joint through code. This may be feasible for the simplest of rigs, but achieving natural free-feeling motion through scripted animation alone would be a daunting and pretty much impossible task.
After literally attempting to hand code each joint sequence I gave up realizing that this is something I must be able to accomplish in a procedural way by exporting joint animation out of Maya into a parse-able format. This sent me down a new road – learning a bit of Python and building my own pipeline for exporting joint animations out of Maya and into AR Studio.
It certainly worked for my purposes and performs well and saved me a ton of time. Again the scripts and more information is available here.
Overcoming joint limitations:
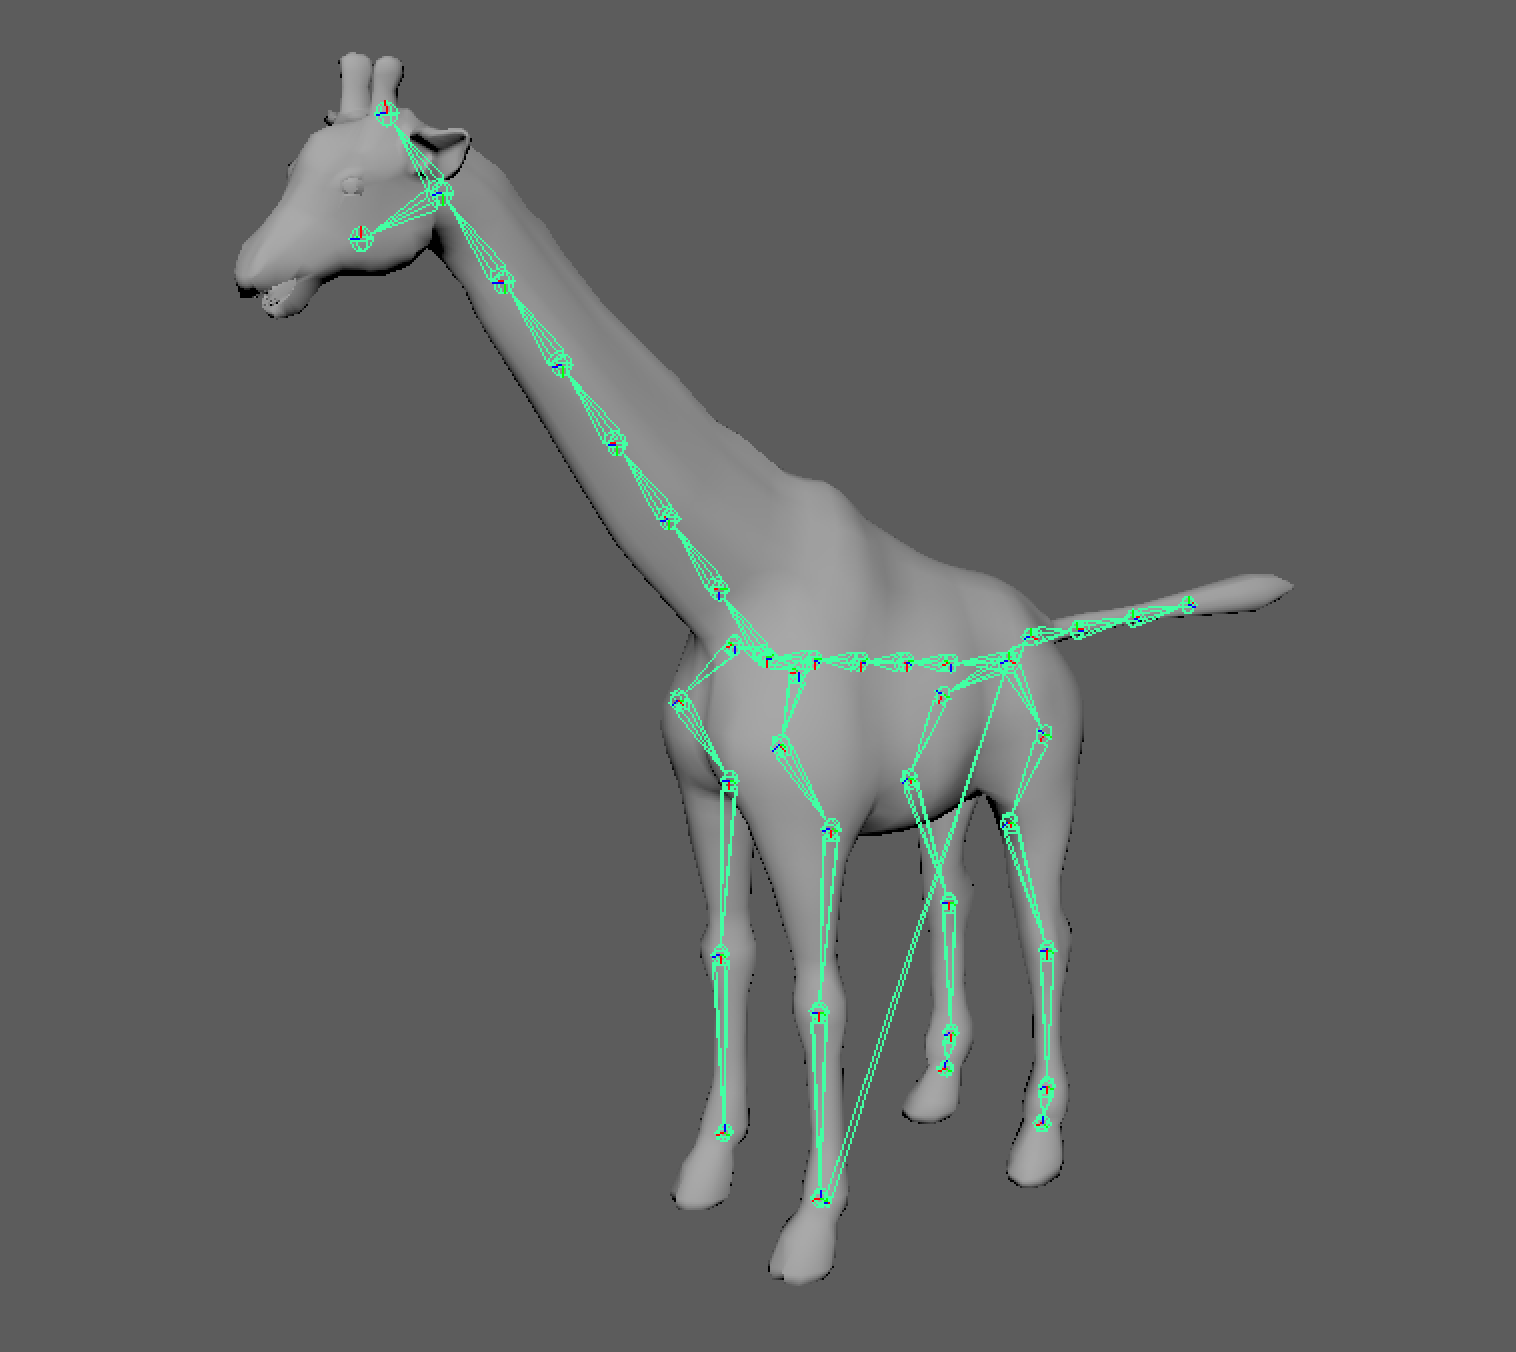
The other issue is that AR Studio only allows 20 bones to be bound to a skinned mesh. For simple character rigs this might be fine, but the character I was using – a realistic giraffe, was rigged with over 65 joints. I was able to eliminate a few, but given the style of animation we were after, 20 bones were not going to come close to enough deformation to handle the various head, tail, mouth and body movements in a realistic way.
My solution was to split up mesh into component parts for each of the legs, tail, body, and neck with each driven by a section of the skeleton with less than 20 joints. However, with unique mesh parts each bound to individual armatures, the seams between components would easily separate as the joints were animated. So the solution was to overlap each rig to share two duplicate bones with one extended beyond the skinned area. I kept the deformation weighted primarily to the second or third joint from the end.
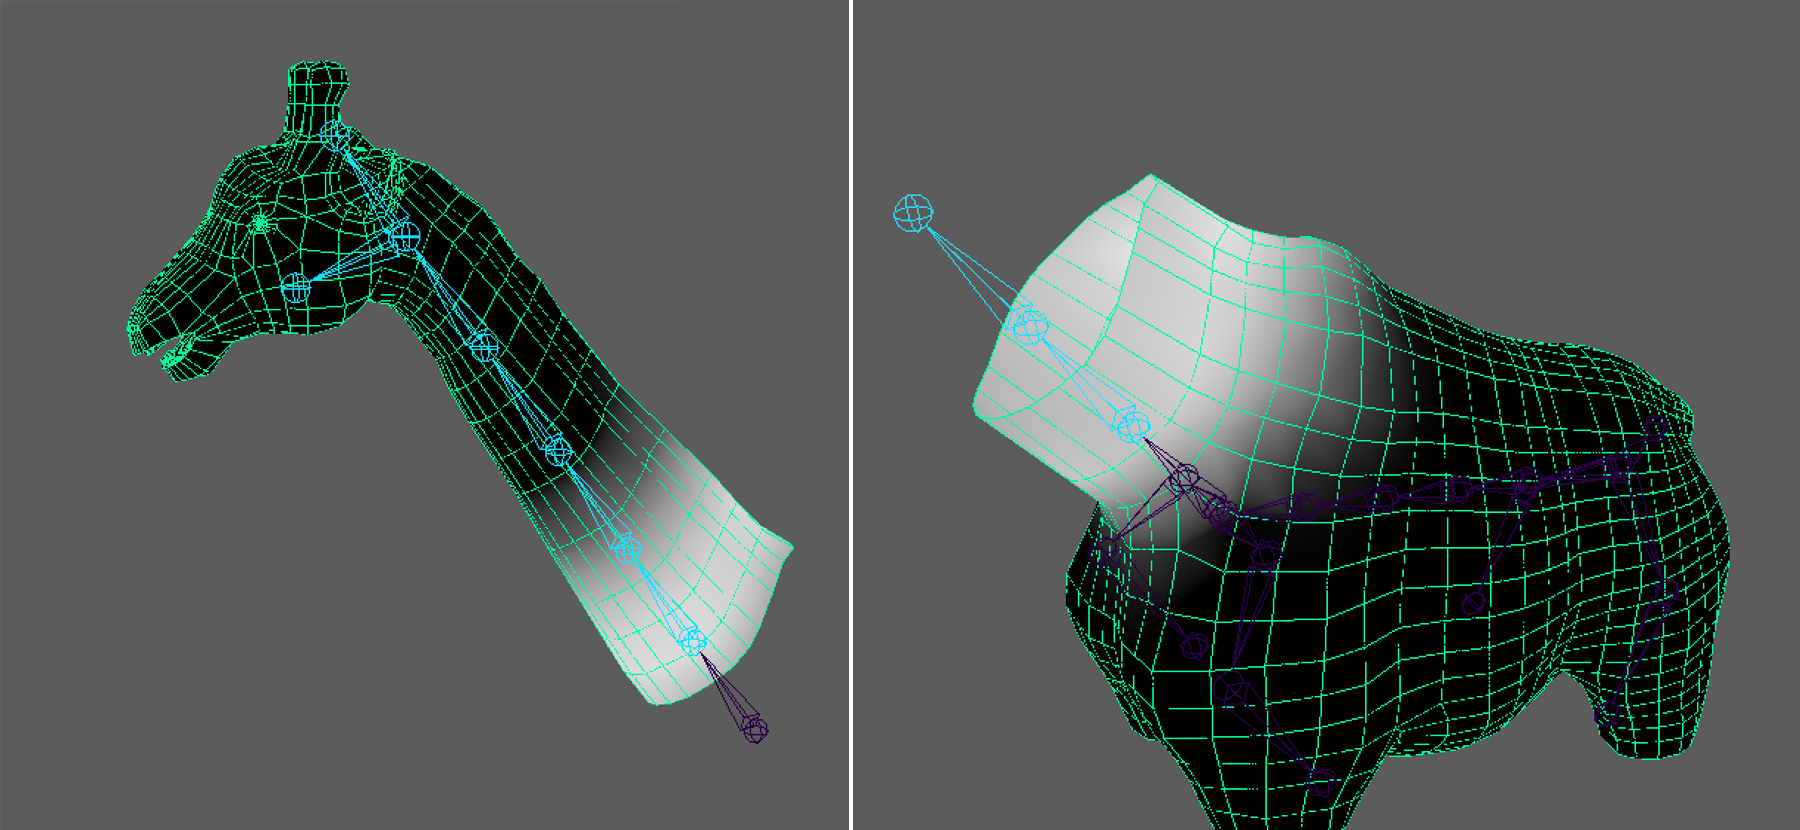
I exported each section as a unique skinned mesh and then reparented the duplicated bones within the root skeleton in AR Studio. This technique worked out pretty well and prevented the seams between skinned meshes from pulling apart and didn’t seem to suffer any real performance loss either.